Ok, so you have your face paint . . . now what? If you don't have your paint, see my "Face Paint" page for everything you need to know. On this page, I will try to explain how to apply your paint and makeup to get the best Ahsoka look! Feel free to experiment on your own, but this page is just here to help guide you and share share some tips and tricks that I've learned. If you are in any way confused or would like more information or pictures, PLEASE contact me from my About Me page! I would be more than happy to assist you in any way I can!
Step 1: Pull back your hair
If you will be wearing a headpiece, you will probably want to get your hair up in your hair net first. If you're not wearing a headpiece, then just pull your hair back in a ponytail or something so that it's not in your way.
Step 2: Cover your eyebrows
Something that is rather obvious when you look at Ahsoka's face is that she has no eyebrows. Being that I am a human and not a Togruta, I knew something had to be done to cover my eyebrows because if you're anything like me, I wasn't about to shave mine off for the sake of a costume! For my quick Disney costume, I just put my white paint above my eyebrows, but had I known how easy it was to cover my eyebrows, I would've done it in a second!
The first tutorial I looked at recommended eyebrow wax to cover your brows. While this method probably works a little better than the one I'm about to show you, it also costs a bit more. Kryolan makes professional eyebrow wax specifically for covering eyebrows, but I think that the following method is a bit easier both to apply and remove. You won't believe this when I first tell you, but here's all you need:
A glue stick! No seriously, the glue sticks that 3 year olds use for crafts and such. I was a bit shocked when I first heard about this method, but it makes perfect sense! Glue sticks are non-toxic, cheap, and wash out with warm water. Some professional makeup artists use this method for concealing brows! It took me a few tries to master how to cover my brows well, but it really works!
I had a gel glue stick lying around the house, and I really enjoy using it! It's not a liquid and works like a regular glue stick, but it's a little bit more moist than a few of my regular glue sticks (or maybe they were just dried out . . .) which makes it easier to apply. Just any good glue stick will work!
I pretty much followed a tutorial by EnKore Makeup on YouTube seen at the right to learn how to cover my brows. Toward the end of the video, he shows how to conceal the glue to match your skin tone, but since you will be applying orange and white face paint on top of the glue, you don't need to do those steps. I recommend watching this video to illustrate how to conceal your brows, however I have typed out the steps below just in case! You can conceal your brows in 7 basic steps:
1) Pluck any extra eyebrow hairs. I have naturally large eyebrows and occasionally get some hair above my nose, so just pluck any hairs out that you wouldn't normally have. I'm not saying to go and change your eyebrow shape, but just neaten them up if they aren't already (mine usually aren't!). The reason I included this as a step is because any hairs that are not covered by the white paint will be easily noticeable.
2) Apply the glue stick to your brows against the direction of the growth. This is done to get the glue up under the hairs of your eyebrows so that they stick down better.
3) Smooth your brows back down in the direction of the growth, pressing them flat against your skin. I like to use an eyebrow/eyelash comb to get all of the hairs completely flat.
4) Apply 3 layers of glue in the direction of your eyebrow growth, letting the glue dry for a few seconds between each layer. Make sure you get ALL the hair, including the hair closest to your nose. I tend to forget this hair and it really shows under the white paint if you don't glue it down! Press the hair down and smooth the glue immediately after applying the glue for each layer. Don't worry if you get some glue on your skin around your brows, we will deal with it at the end.
5) After 3 layers of glue, lightly powder your brows to soak up the excess moisture from the glue. You can use any makeup powder that you have no matter what color it is.
6) After applying the powder, you're going to apply another layer of glue, but this time, you're going to apply it with a makeup spatula. If you don't have one (I for one don't), you can use a butter knife. I found a small, flat tool in a manicure kit that we had lying around that works perfectly. I'm not sure what it is supposed to be used for, but I use it for glue now! Scrape a bit of glue off the top of the glue stick with the spatula/knife and plaster it on top of your brows. Just like before, make sure to get all the hair closest to your nose! Smooth it out using your finger or the spatula/knife until you get a thin, even layer. This step will give you a flat surface and eliminate any ridges from the brow hairs.
7) Add a final layer of powder and you're set! If you need to eliminate any excess glue on your skin, just use a q-tip and some warm water and it will rub right off!
To remove the glue, I just take a warm washcloth and rub it back and forth across the surface of my brows a few times until all the glue is gone. Can you believe how easy this is?!
3) Apply eyeliner, false lashes, and eye makeup.
I looked for false lashes for a while trying to find some big, full ones that I liked. All of the ones I saw in places like Walmart and Target looked too small for the look I was going for. I ended up purchasing some at Walmart around Halloween that are a little too big because I can't get them on! If you want to purchase false lashes, buy some "normal" looking lashes. The fullness that they will give you should be enough to give you a good Ahsoka effect. In all honesty, you will have enough going on on your face that the lashes won't matter that much!
After you apply your false lashes, line your upper and lower lash line with a black eyeliner. This step changes the entire look of your eyes and face as a whole, so make sure you do this step!
I mentioned on the Face Paint page that there is a warning on all of the orange paints about using orange paint around your eyes. After some research, I discovered that this is a result of the stronger pigment used in red (and therefore orange) dyes and that the stronger pigment can burn your eyes.
To combat this, I use a coppery-orange eye shadow around my eyes and on my eyelids. The eyeshadow I use is made by Maybelline New York and is Modern Metallics number 260S "Copper Craze." It was the cheapest orangey eye shadow I could find at $2.94 and works really well! My orange Paradise face paint blends seamlessly with it, and I don't have to worry about the orange around my eyes!
4) Apply your orange paint
So, just to summarize, I purchased Paradise orange paint and Diamond FX white paint. The other brands I recommended on my Face paint page should all apply the same way as mine do, so no matter what you use, it should all turn out about the same way.
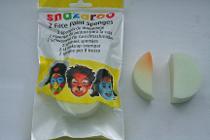
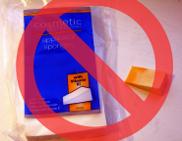
Under the Snazaroo section of my Face Paint page, I recommended that you purchase Snazaroo face paint sponges. Ben Nye, Paradise, and I believe another brand all sell their own types of sponges for applying the face paint, but Snazaroo were the cheapest and most easily acquired for me. They sell Snazaroo sponges at Michael's for around $3.00 and are totally worth it!!! They help to apply the paint smoothly and evenly in a very short amount of time! I tried cosmetic sponges, but they soaked up way too much water to use with my paint. I also tried using my fingers to apply the paint, but my paint turned out super splotchy and took forever to apply! I highly recommend these if you want your paint to turn out well!
The Snazaroo sponges come in a package with two large circles, so I cut one almost in half and use the wedge to apply my paint. To use it, I wet the sponge and squeeze out any excess water. Then, you rub it in your face paint cake until you get a creamy texture and then dab the sponge with the paint on it onto your skin. If you drag the paint onto your skin, you will end up with a streaky texture, so just experiment until you get the hang of it!I like testing the paint on my hand or forearm arm where I can see it really well, but that's just me! If you have the sponges and a good paint, this should be super easy!
5) Apply white paint
As a review, the two white paints most frequently recommended are Wolfe Art and FX and Diamond FX. They have a little bit of wax in their products which helps the white to be brighter than most other face paint brands. I purchased Diamond FX because it was a little cheaper for me, but I read that Wolfe and Diamond are both essentially the same thing. For more information, look at my Face Paint page.
This is where the majority of your time will be spent. Getting clean white lines is not easy! And even though I had good paint, it still took a few layers of white to get the paint really bright, so set aside a good hour if you want it to look neat.
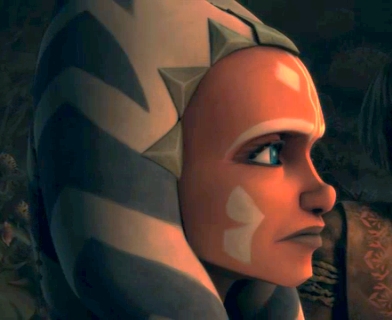
After trying the shapes on Ahsoka's cheeks when I went to meet Ashley Eckstein in Atlanta, I discovered that to get them the same on both cheeks I would need some sort of a stencil. So, when I experimented with my new paint, I sat down with a reference image and drew out what I believed to be a good representation of Ahsoka's cheek markings.
After I had a drawing that looked good to me, I drew another larger outline around my original drawing and then cut the original drawing out, leaving the space between the drawing and the outline. Now you have a "stencil" for Ahsoka's cheek markings! You only need one drawing because you can just flip it over to do the other cheek.
To attach my stencil, I used a small piece of tape that I rubbed between my fingers a few times to help it loose a little bit of its "sticky-ness." It still took a little bit of the orange paint off, but its easily fixable at the end.
I feel that I made my drawing a little bit too small. When you draw your markings, look at the shape and placement in relation to Ahsoka's other facial features. For example, I have noticed that the angled part frames Ahsoka's mouth, however, I didn't look at how close it came to her eyes, so I made it a little too short.
Once you have your stencil attached, take a wet q-tip and wipe off a portion of the orange inside the outline. Don't go too close to edge of the stencil. Let the water dry (you may want to blot it with a tissue) and then you can begin painting.
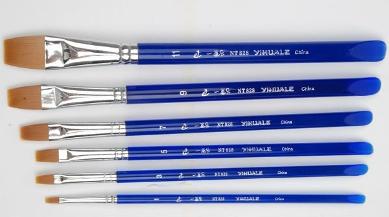
Unlike with the orange paint, you will need to paint the white lines with a paintbrush. I like using the synthetic paintbrushes because of the texture of the bristles and the way they hold water. If you don't have some of these brushes, you can purchase them at Walmart, or any arts and crafts store. You can purchase them individually at Michael's! The size you want to use is completely up to you. I used a small square brush and small pencil-like brush, but whatever you want to use will work!
To use the paint cake with the brushes, wet the brush and rub it around on a small spot of the cake until you get a small "puddle" of paint. Don't get it too wet and make sure you concentrate all the water in a small spot instead of wetting the whole cake.
Once your cake and brush have paint, outline Ahsoka's cheek markings using your stencil as a guide. Don't paint over your stencil (it will soak through, trust me) but just use it to guide you.
I will be honest that even though both the Diamond and Wolfe paints are really good paints, it still will take a few layers of paint to get a vibrant white. I also had to rinse and dry my brush between each layer due to the orange paint that kept mixing with the white, however after it was finished, it turned out really well!
After I painted both cheeks, I covered my eyebrows with the white paint. It took a few layers of paint just like with the cheek shapes, however it covered my eyebrows really well. This is where if you didn't cover all of the hair on your eyebrows it really shows because it will stick up through the white paint instead of laying down flat.
My apologies on yet another incomplete page! If you would like more information, PLEASE email me and I would be happy to send you the remaining steps and pictures.
becomingahsoka@gmail.com
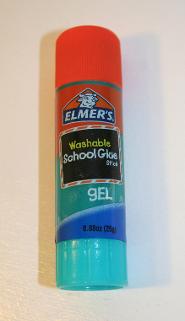
This is the glue stick that I use! I really enjoy the gel because of how moist it is, however I believe any glue stick will work fine!
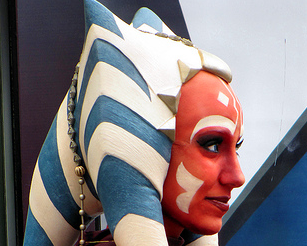
The Ahsoka in Disney World doesn't have concealed eyebrows. Instead, the headpiece is attached to a "false forehead" that comes down over the actress's eyebrows. This makes it easier to do her makeup since the forehead markings don't have to be painted on every time. I have seen several Ahsoka headpieces done this way, though getting the paint colors to match your face paint and getting the forehead to blend seamlessly with your skin is somewhat tricky.
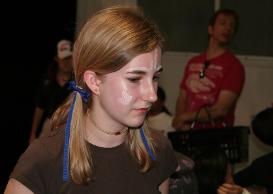
My first Ahsoka makeup attempt when I went to Disney. It was not great in the least, but introduced me to Ahsoka's makeup!
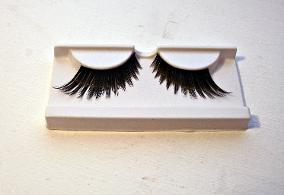
When looking for false lashes, don't get large ones. Though they looked like Ahsoka's full lashes at the time I purchased them, I later learned that between the eyeliner and the orange and white paint, large lashes may look a little bit gaudy. Besides, I can't even get them on!
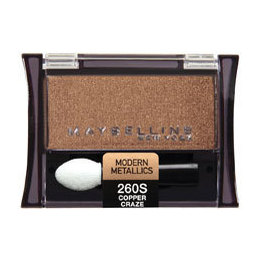
This picture doesn't do the eyeshadow justice. In reality, it is a much more coppery-orange than this photo shows.
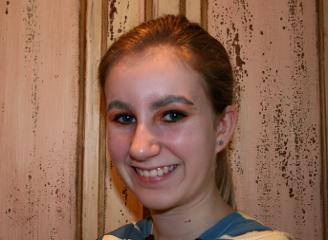
It doesn't look very attractive at this point, but here's a picture of me with covered brows, eyeliner, and eyeshadow. I don't have false lashes on in this picture or mascara, but you can see how it doesn't make that much of a difference without them. The eyeliner more than compensates for them.
As I have mentioned before, if you need more images or are confused about something, please contact me! I check my messages daily and would be more than happy to give you any help I can!
becomingahsoka@gmail.com
I purchased Diamond FX paint, however Wolfe Art and FX is an equally good paint from what I have read about it!
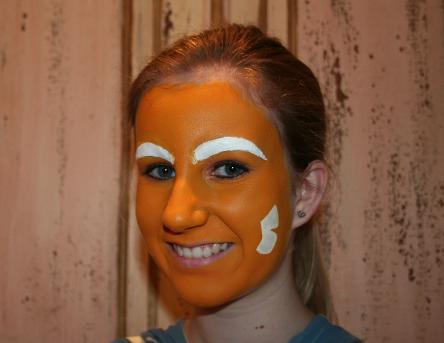
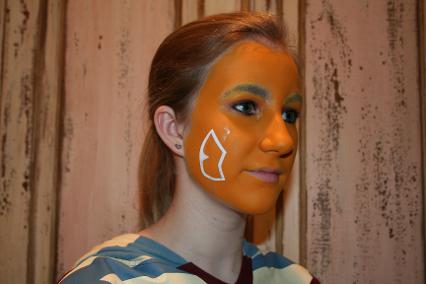
I chose this picture to show what happens when you don't cover all of your eyebrows. You can see closest to my nose how the paint is a little splotchy. I didn't work especially hard on that spot because I knew the forehead lines would run into it, but you can see a glimpse of what happens. I also didn't put enough paint on my cheek, so you can see what it looks like without enough white paint on. It isn't terrible, but parts of it are a little see-through.