After being surprised that we were going to Disney for Star Wars Weekends a few years ago (and knowing that Ashley Eckstein was going to be there), I wanted to make an Ahsoka costume, but only had 2 days to come up with one and about 3 hours to put it together. This costume is far from perfect, but is sufficient if you only have a short amount of time and the belts make it easily recognizable. I have included suggestions of things that you can add if you have extra time, though those were not used in my original Disney costume.
Purchase an outfit:
If I had had enough time to purchase the Ahsoka Tunic Top (As pictured above) from Her Universe before Disney, I would have done so in a second! The only thing that might have stopped me would have been the long sleeves in Florida during the end of May! At the time I purchased the top, it only came in youth sizes, but it now comes in adult sizes as well. I have the youth XXL and wear it all the time! Even if you don't use it for your costume, I wear this top around town or at the house to show my Ahsoka pride without looking crazy with a headpiece and arm guards on ;) If you have never heard of Her Universe, I encourage you to visit their website! Her Universe has Star Wars fangirl clothing along with products for many other fandoms. I own many of their Star Wars products, and they are all among my most prized possessions! If you don't have time to order this wonderful top or want a "real" Ahsoka outfit, then keep reading for my quick and easy Ahsoka outfit.
The Body:
The body of my outfit was very thrown together, but was very comfortable for walking around Disney all day. Mine lacked the holes that Ahsoka has in the front and back of her tunic, but the holes would have been a nightmare walking around all day. After the event, I experimented with the holes in the shirt and accidentally made the one in the back too big, so to wear it, I would have had to constantly pull the back down to keep the edges flat. Besides, worrying about sunscreen on my face and arms was enough :)
Materials:
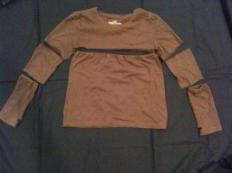
One brown long-sleeve shirt
One brown short-sleeve shirt
Brown skirt
Brown leggings (or dark grey if you have them)
Where to buy:
Check your local thrift store, Goodwill, or Walmart if you don't have these items already.
The Arm Guards:
First, I took the long-sleeve brown t-shirt that I had and cut the sleeves off for the arm guards Ahsoka wears. I wish I had cut them so they covered a little bit more of my arms, but it worked for the look. I then tucked the raw edge under to create a channel for elastic, added the elastic, and then cut a thumb hole.
The Top:
Due to time, I just used the brown short-sleeve shirt as it was for the top.
The Skirt:
I used a drawstring skirt that my mom had for the skirt at Disney, however I was able to go back and use the torso of the long-sleeve shirt to make a mini-skirt after the event. I was worried that the torso of the long-sleeve shirt would be too tight, but it turned out really well! I just cut the torso off the shirt under the arms, hemmed the raw edge, and added elastic. The shirt was already finished on the sides and bottom, so that saved lots of time! I recommend trying the shirt like a skirt by putting your legs through the neck before you cut it, just to make sure that the shirt is big enough around your hips.
The Leggings:
Ahsoka's leggings are a dark grey, however I just used some brown leggings for Disney. It got the idea across.
Belts and Other Accessories
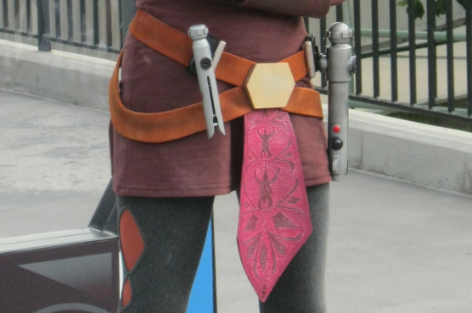
The belts are the distinguishing part of Ahsoka's outfit, so I would make sure that you have them. Mine were far from perfect, but they are the identifying factor of the outfit.
Materials Needed:
Red ribbon (about an inch wide)
A purple bandana
A few safety pins in assorted sizes
A buckle of sorts (I found mine on a belt from my mom)
Where to buy:
Your local Walmart or craft store should carry these things.
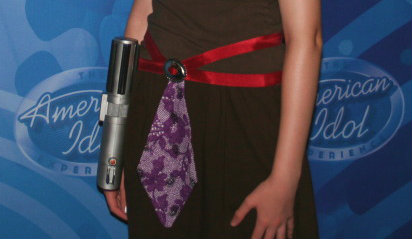
The Belts:
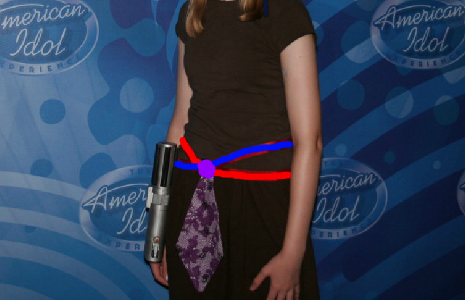
The best way I saw to make Ahsoka's belts was from ribbon. So I bought red ribbon that's almost an inch wide and cut two long pieces. Wrap them around your hips going diagonally so that they cross in the middle on your front and back (see picture). The ends should all meet in the front. In the picture, the blue is all one piece of ribbon, and the red is all another piece of ribbon. The purple is where all the ends are. I used nail polish on the ends to keep them from fraying. The color doesn't matter that much since you won't see it. To hook the belts together, I used lots of safety pins. I think I pinned them to each other so the blue ribbon (in the picture to the right) was all hooked together and the red ribbon was hooked together. Then I pinned them all in the front. Somewhere in there one of the pieces of ribbon was looped through the buckle. I don't remember enough to explain exactly what I did, but all I remember is that there were a lot of safety pins :) Just fiddle with the ribbon and the buckle you're using until you get all the ends hidden. My buckle was a metal decoration on one of the belts my mom had that I was able to slide off the belt. Be creative and see what you can find :)
The Tabard:
For the tabard, I bought a purple bandana at Walmart, sewed it into a diamond shape like Ahsoka's, flipped it right side out and stitched around the edge. I only had a matter of a couple of hours to sew everything, so that was just quickest and easiest for me. I then safety-pinned that to the belts underneath my buckle.
The Lightsaber:
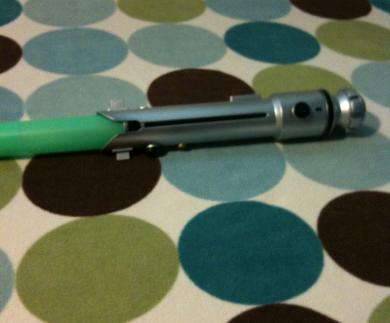
I didn't have the toy Ahsoka lightsaber when we went to Disney, so I just used an Anakin style lightsaber that we had (the blade is green for some reason...).
You can buy the Ahsoka toy lightsaber on Amazon or other online sites, however be aware of a few things about it:
1) It does not have a clip on it! It's good for carrying around, but you won't be able to clip it to your belt. The blade also automatically extends when you point it downward, so you would have to tape the blade in if you wanted to carry it upside down.
2) The lightsaber is poor quality! It's good for display, but if you flick the blade too hard, it falls out! It would NOT hold up to lightsaber fights! If this is for a younger child, consider getting a better quality lightsaber that's not Ahsoka's.
3) It does light up and looks just like Ahsoka's, so it looks pretty cool if you are just carrying it around.
Food Capsules:
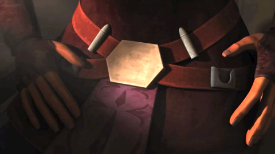
The proper name for the sliver things on Ahsoka's belts are "Jedi Food Capsules." I did not make these for my Disney costume, but they are an easy addition to the costume that add further detail.
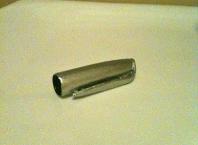
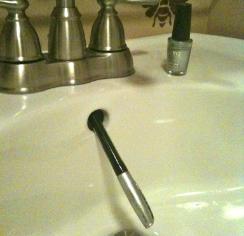
First, I bought silver nail polish and cheap pens at Walmart that looked the right shape. The pens were a cheap version of a Sharpie and were about a dollar for 2. The pen, it turns out, fit very well in the overflow hole in my sink. I painted the end of the pen just to test out the paint, but it also helped to keep the pen in the sink. After I painted the cap, I just hooked the other end in the overflow hole. I recommend testing to make sure that the end fits in your sink hole before you paint the cap just to make sure that it won't slide back out and wreck your paint. Paint several coats of polish on the cap, loosening the cap from the body of the pen after each coat has dried.
I did about 5 coats on each of my pens to ensure they were fully covered. Once you're satisfied with how they look, throw the pens away and clip the caps onto your belts. If you want, you can put some air-dry clay in the bottom of the caps to close off the bottom, then paint the bottom silver as well. Otherwise, you can just leave the ends open.
Hair, makeup, and face paint:
Face paint
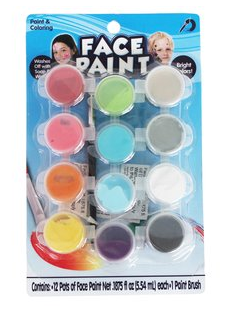
With the limited amount of time I had to make an outfit (and two days before we left town) I had to purchase all my materials at one store: Walmart. Walmart is a wonderful store and has such a wide variety of items at low prices, and I had to get everything there.
I bought the cheap Walmart brand (or something) face paint assortment for $2.47. It was the only thing that I could find at that time (during Halloween they had a bunch of other face paint). It was an ok paint, but not a dense rich white color either. It was very (how do I put this . . .) thin. You could see my skin very well through it. It got the job done for what I paid for it, but I knew I would need something better for my "professional" costume. The morning we were to go to Hollywood Studios, the alarms we had set for 6:00 didn't go off, and so I did most of my painting in the car and forgot the diamonds on my forehead (snap!). I also didn't worry about covering my eyebrows (again, not even on my radar of something I would end up doing), so I just put the paint above my eyebrows. I didn't worry about doing my face in orange (the idea hadn't even crossed my mind at this point) and just as well because re-applying sunscreen throughout the day to my face would have been impossible.
Speaking of sunscreen, if you're going to an outdoor event where you will need it, be sure to apply it all over your face before you paint your face and to let it soak in really well before you paint. I had problems one year at an event, and the lady had a difficult time with the face paint over my sunsreened face. Thankfully, I didn't have any problems at Disney and managed to leave the park that day without a sunburn and some face paint still on my face! Another note: I recommend bringing your face paint with you to whatever event you are attending because as the day goes on, you're highly likely for some paint to come off! I had foolishly left mine in the car, and the Disney people were going to charge $7 for a touchup job (it was the minimum they could charge). So, bring it with you in a small bag or something because you will more than likely want it later :)
Makeup
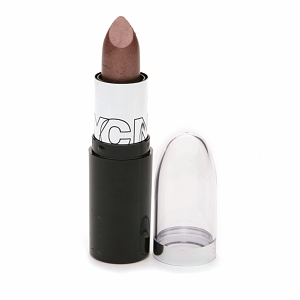
As stated above, all of my items for this outfit were purchased at Walmart. In the makeup department, I went for the cheapest things I could find in the right colors. Ahsoka's lips are a brownish color, so I purchased New York Color number 304 "Mocha" lipstick for 93¢ It turned out to be a very nice color, and worked really well. I use it in my "professional" Ahsoka costume as well! I use this lipstick as everyday lipstick as well, and I love the color! :)
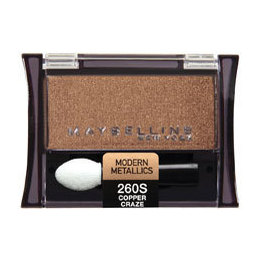
As far as my eyes, I purchased Maybelline New York Modern Metallics number 260S "Copper Craze." (The picture doesn't do it justice by the way. It's much more coppery/orangey than the picture shows) It was the cheapest orangey eye shadow I could find at $2.94 and ended up being the most expensive item in the whole costume! Just like with the lipstick, I love this color as everyday eyeshadow, and I also use it in my "professional" Ahsoka costume.
Hair
There was no way I was making any sort of a headpiece. I knew that, but I wanted to do something with my hair. So, I bought some about 1/2" blue ribbon that was about the right color for $2.00. All I did was put my hair in three pigtails: one on each side and one in the back to imitate Ahsoka's three headtails. There was no way for me to make stripes in my hair with the ribbon, so I stuck a piece of ribbon the length of my hair from the hair band to the end of my hair and then looped the ribbon in the elastic so it hung down. I also tied a bow around each hair elastic to hide it as best I could. It was by no means perfect, but it worked for me and gave the right effect. I had a blue headband that I remembered later that I could have worn, but the thought didn't cross my mind until later.
I made Ahsoka's padawan beads and necklace using a few of the beads that I had on hand at the time. I have been into making jewelry for a while, so I had all of the proper tools and beads to do it. I wasn't able to look for beads before Disney, so my necklace and padawan beads aren't screen accurate, but they worked for the effect.
I hope this helps those looking for a way to make a cheap and easy Ahsoka outfit! Email me at becomingahsoka@gmail.com if you have any other questions and I will be more than happy to help however I can.
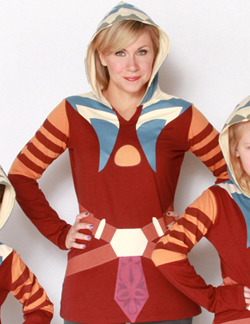
Ashley Eckstein (voice of Ahsoka and founder of Her Universe) wearing the adult Ahsoka Tunic.
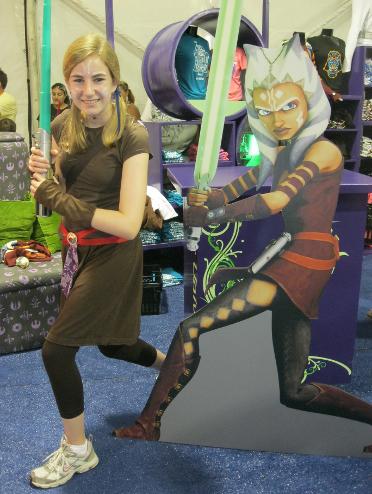

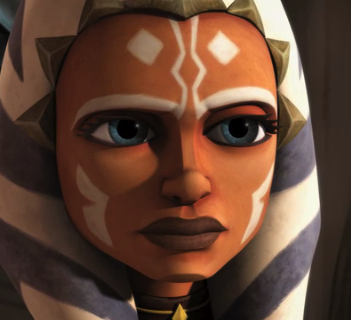
The photo above is of the Disney Ahsoka at Star Wars Weekends. It's a good fabric and material reference, though a few colors are a little off in my opinion.
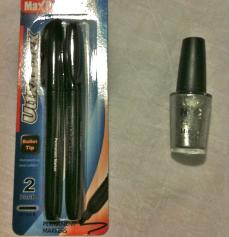
My cheap Walmart paints.
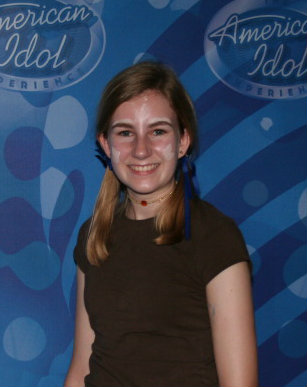
You can see here where the face paint was coming off my forehead (this was late in the day) and where I had forgotten my diamonds on my forehead (ugh!) :)
Please excuse the people in the back of this photo . . . It's what happens when you take photos in public. :) You can see the makeup and hair ribbons well in the photo.
